Printing to film using DICOM Printer 2

This is the first in a series of posts explaining how to use DICOM Printer 2. It’s a complex tool, with some very simple uses. Despite our best efforts to make the world wholly digital, this is one of the most popular!

Goal

To print true-size images of dental x-ray, with a facility logo in the corner of the film.

We’re looking to create something like this:
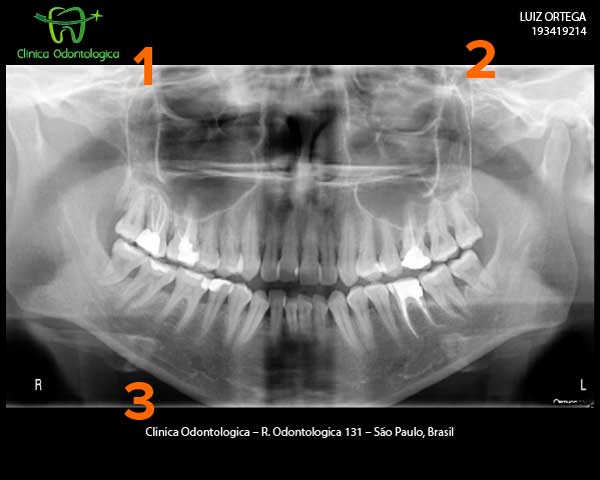
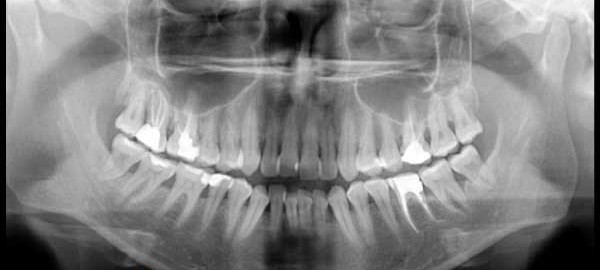
Ceph image printed with DICOM Printer 2

Note that:
1. There is logo at top left.
2. Patient information is outputted at top right.
3. Clinic information appears at the bottom.

This tutorial will go through the few steps required to output the image. We will tackle the logo and patient demographics in a separate post.

Details

Source application: Dental Imaging software, like DBSWIN or SIDEXIS
Destination: AGFA Drystar 5302 (or any other DICOM Print SCP device)

Let’s Get Started!

Collect your imager connection parameters. This means:

  • The IP address, AE title and port number of the imager
  • Make sure that the DICOM_PRINTER AE title is able to connect to it. You can get help with this part from your imaging vendor.

Download DICOM Printer 2 from our website:
https://store.fluxinc.ca/files

Run the Setup Wizard to install:

DICOM Printer 2 setup start

The Setup Wizard will take you through the process and then offer to run the Configuration Wizard. In the first screen, select Film Printer:
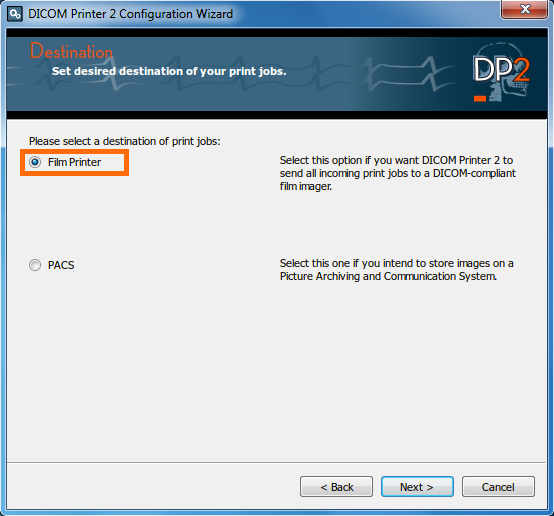
DICOM Printer Configuration Wizard screen 1

You will be presented with the following screen:
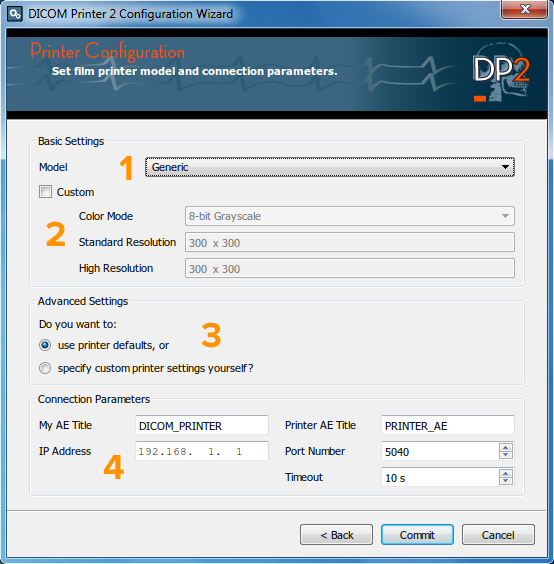
DP2 Film configuration

  1. Select our imager model family from the drop down, e.g., AGFA Drystar 5300. If you don’t see your imager, select Generic, or the closest match from the same vendor.
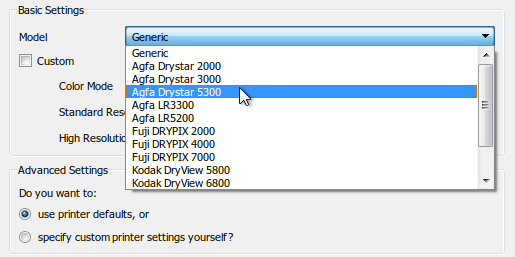
    DICOM Printer 2 configuration wizard printer dropdown
  2. If you choose Generic, then be sure to look up your imager dot pitch and enter it into the Standard Resolution field. The best place to find this is usually the imager brochure from the manufacturer website.

    If the imager brochure lists the dot pitch in microns, then you can convert this value to DPI using Google. For example, if your imager lists a 50 micron dot size, then Google ’50 microns to inches’, then divide 1 by the result. The answer in this case 1 / 0.00196850394 = 507.9, or 508 x 508.

  3. You should probably leave the defaults unchanged for this example.
  4. Enter the Printer AE Title, IP Address and Port Number of the imager.
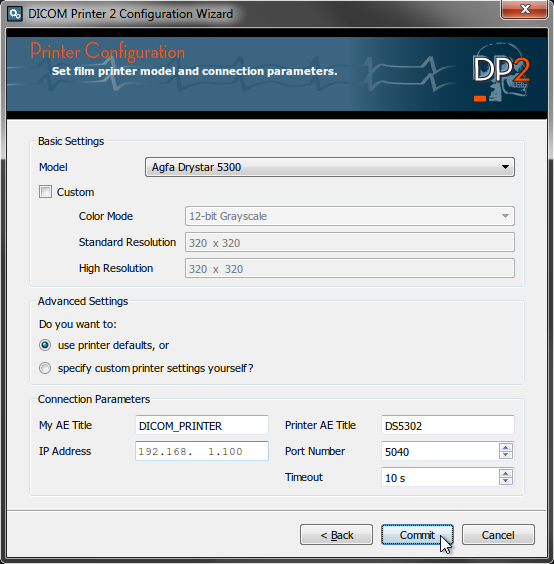
Printer configuration completed

Then click Commit!

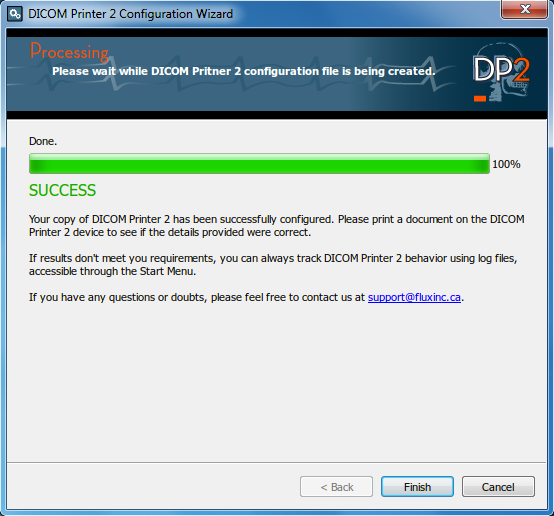
DICOM Printer 2 Wizard end

You’re Ready to Print!

Launch your application and Print, then select the DICOM Printer 2 printer from the print dialog.
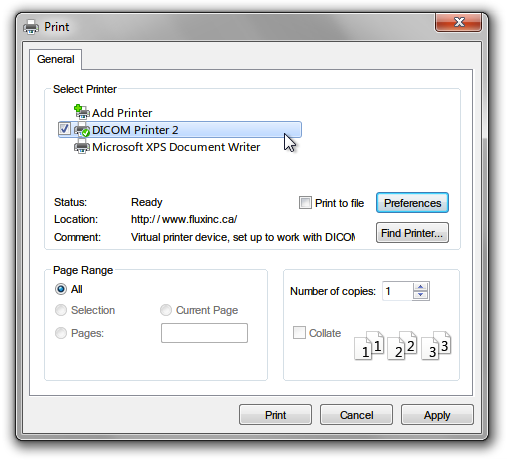
DICOM Printer print dialog selection

Please ensure to select the right film size!
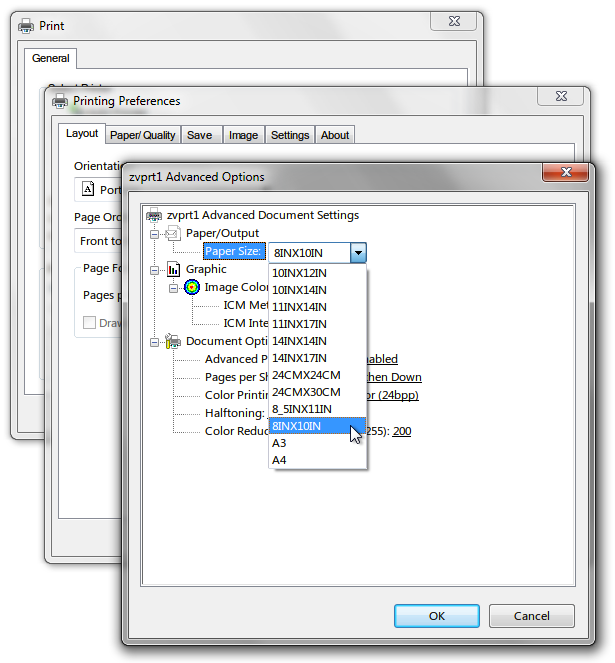
Film size selection

If you experience any trouble, send us an email!

Proceed to Part 2: Adding a logo and footer

Parsing and Assigning DICOM Dates in DP2

Data capturing is a very powerful and useful feature of DP2, let me provide you a an example of how to use it.  Because DICOM Printer 2 is based on the Qt framework, it employs the default QRegExp syntax, described on this page.

Let’s assume that you use DP2 to send reports to PACS and you want the application to capture study date from it, so that you wouldn’t have to edit study details in PACS every time. Since DICOM Printer 2 extracts text content from every print job and makes it available to ParseJobTextFile action, this is fairly simple feature to implement.

First you need to examine text file contents. You can do that by stopping DICOMPrinterService prior to printing. The files will become available in the queue, accessible through Start -> DP2 -> Links -> Open Queue Folder. When you open the TXT file in the queue you might find line like this:

Report Date: 15-11-12

Which tells us that the report was printed today. There is a problem with this date, though, it is not a valid DICOM date for a number of reasons:

  • it uses a reversed, day-month-year notation,
  • the year is expressed in short, two-decimal form,
  • separators are unnecessary.

A valid DICOM representation of this date would look like this:

20121115

So how can you make it work? First, let’s create a regular expression matching this line. There are many websites allowing you to create and test regular expressions online: this one is the easiest to use but I prefer another one because it not only shows if the expression is valid, but also displays captured elements. Using any of these, you should be able to create expressions quickly.

In our example here’s the result:

Report\s+Date:\s+(\d{2})-(\d{2})-(\d{2})

The expression matches a line containing the word ‘Report’ followed by a non-zero number of spaces, then the word ‘Date’, a colon, another non-zero number of spaces, two digits (decimal), dash, two digits, dash and, again, two digits. Each pair of digits is enclosed with parentheses, which means that they are captured by this expression.

Note that this expression assumes that the date contains leading zeros when the day or month are less than 10, e.g. 01-01-13 for New Year’s day of 2013.

OK, so we have the expression that matches our line and we capture the required numbers. All that is left to do is to arrange them in the DICOM manner. You can do that by using the replacePattern attribute, available to DcmTag elements of both types of parse actions. In our case we want to replace the order and prepend the year with ’20’. Here’s how the attribute should look:

replacePattern="20\3\2\1"

The slash-number notation is used to back-reference a captured group. The default replace pattern for DcmTag elements is ‘\1’, which means that it simply uses the value from the first group.

Here’s how the entire action would appear:

<ParseJobTextFile name="GetDate">
        <DcmTag tag="(0008,0020)" replacePattern="20\3\2\1">Report\s+Date:\s+(\d{2})-(\d{2})-(\d{2})</DcmTag>
</ParseJobTextFile>

You could also add the ‘mandatory’ flag, if you would like DP2 to stop processing when the date is missing from the report.

As always, remember to call your new action from the Workflow block, like so:

  <!-- Your preceding action definitions -->
  <ParseJobTextFile name="GetDate">
        <DcmTag tag="(0008,0020)" replacePattern="20\3\2\1">Report\s+Date:\s+(\d{2})-(\d{2})-(\d{2})</DcmTag>
  </ParseJobTextFile>
</ActionsList>
<Workflow>
  <Perform action="GetDate" onError="Hold" />
  <!-- Rest of your workflow -->
</Workflow>

New Year, New DICOM Printer Versions

We’re happy to announce the release of new versions of both of our flagship DICOM Printer applications.

Download DICOM Printer

DICOM Printer 1.7.0

DICOM Printer 1.7.0 is a significant improvement over 1.6.5, offering substantial stability and logging enhancements, a re-styled interface, rock-solid compatibility across Windows versions, as well as a brand new DICOM CD folder creation function.  For a full list of changes, please refer to the release notes during application installation.

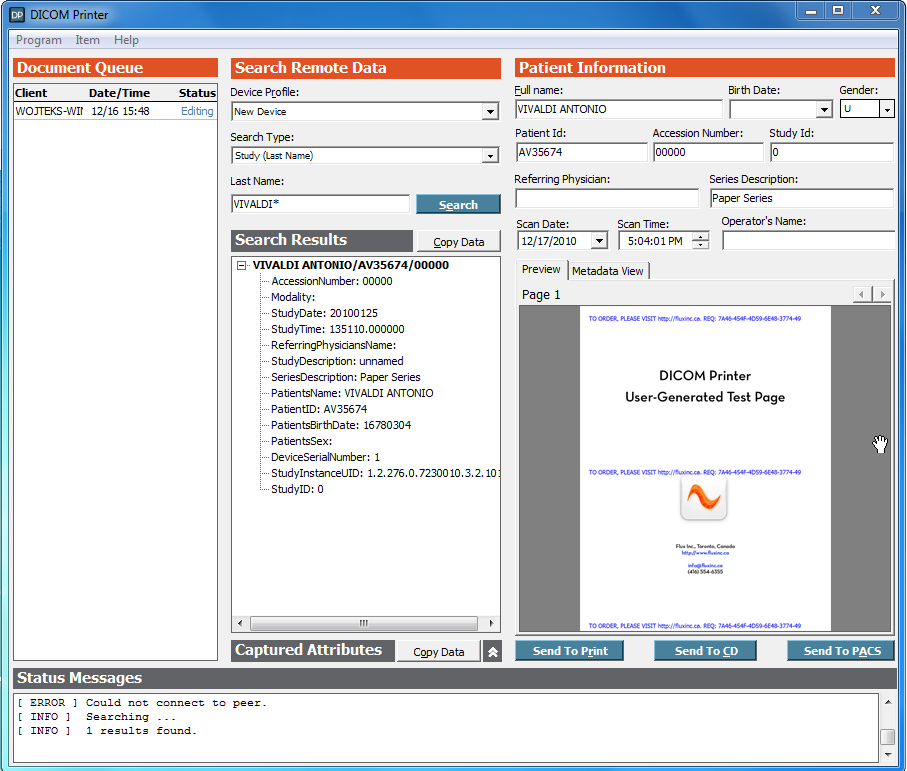
DICOM Printer Main Form Screenshot

DICOM Printer 2.1.6

DICOM Printer 2.1.6 sports a brand-new configuration wizard, allowing quick deployment and management for print to PACS, and print to film applications.  It also includes:

  • A secure and Windows 7 compatible user interface plug-in architecture.  This enhancement makes it possible for DP2 to operate in a networked multi-user environment, allowing interfaces to be presented across user sessions from a centrally hosted installation of the utility.
  • We have included several important plug-ins, including those allowing instant query of PACS and DICOM Modality Worklist prior to storage or print.
  • A new utility called Drop Monitor, which allows PDF, PNG, JPEG, and other image format injection into PACS using a designated watch folder.
  • A new log view and tail interface, providing instant feedback of process results.

DICOM Printer 2.1.6 is the result of many months of development, and we’d be thrilled to hear feedback about our users’ impression of the changes.  Please be sure to send us your comments after you have given it a whirr.

Licensed User Upgrades

Upgrades are available for free for those users who purchased their 1.6.5 and 2.1.5 licenses within the last 3 months, and a low-cost upgrade path is available for those who purchased before that time.  Please contact us for further information if you fall into either of these two categories.