Please note that adding these custom elements to DICOM Printer 2 workflows is a task that requires a little knowledge of XML. If you feel that the post is too technical for you, then ask someone with IT experience to help.
Recap
In our previous post, we went through installation and configuration of basic film output. Although this is great for basic use, most facilities we’ve come across like to see their identity expressed on their product.
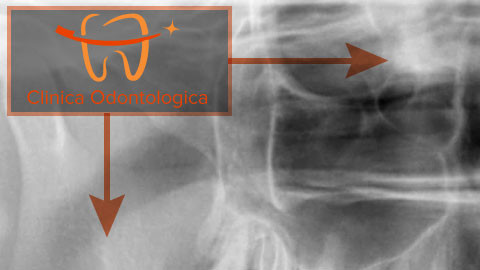
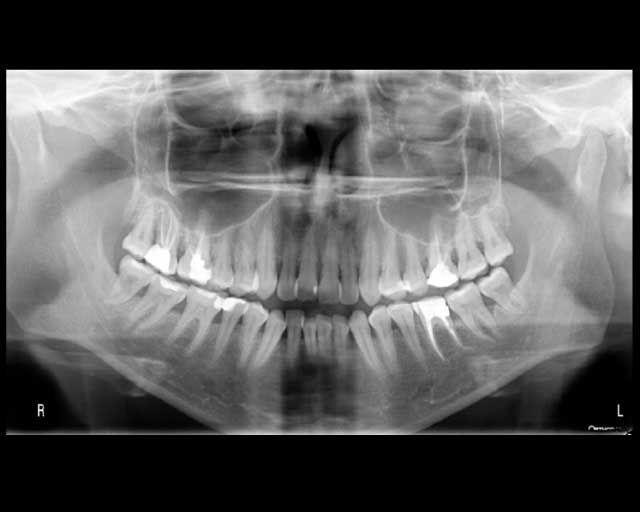
So, we’ll want to go from this:
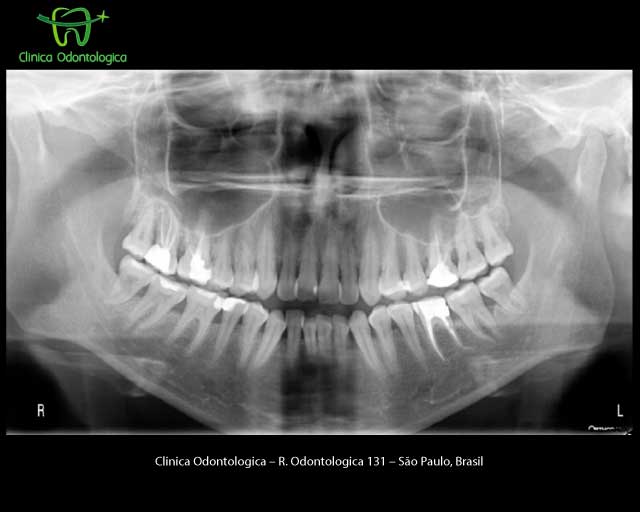
To this!
First Things First
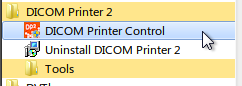
In the previous post, we used the Configuration Wizard. The Wizard does the basics, but to add a logo we need to dig into the actual configuration file. To see it, launch the DICOM Printer Control Center. It can be found via the Start Menu, or by searching in Windows 8.
You will then see the main control window.
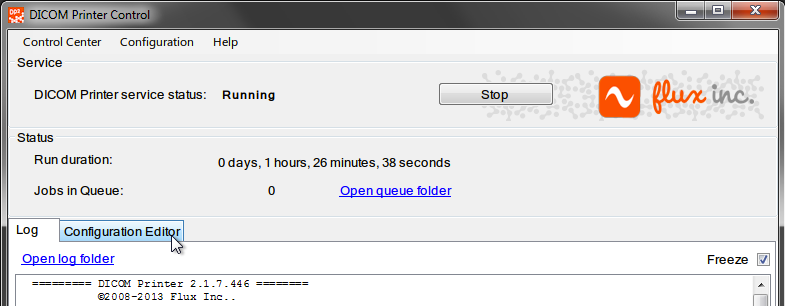
Switch to the Configuration tab. If you followed the previous tutorial, you will see the following text:
<?xml version="1.0" encoding="UTF-8"?>
<DicomPrinterConfig>
    <General>
        <CheckingInterval>1</CheckingInterval>
        <SuspensionTime>1</SuspensionTime>
        <Verbosity>30</Verbosity>
    </General>
    <ActionsList>
        <Print name="PrintOnDevice">
            <Resolution>320 x 320</Resolution>
            <PrintMode>Grayscale12</PrintMode>
            <ConnectionParameters>
                <MyAeTitle>DICOM_PRINTER</MyAeTitle>
                <PeerAeTitle>DS5302</PeerAeTitle>
                <Host>192.168.1.100</Host>
                <Port>5040</Port>
                <AssociationTimeout>10</AssociationTimeout>
                <DimseTimeout>10</DimseTimeout>
            </ConnectionParameters>
        </Print>
        <Trim name="TrimImages">
            <Left>auto</Left>
            <Right>auto</Right>
            <Top>auto</Top>
            <Bottom>auto</Bottom>
        </Trim>
    </ActionsList>
    <Workflow>
        <Perform action="TrimImages" onError="Ignore"/>
        <Perform action="PrintOnDevice" onError="Discard"/>
    </Workflow>
</DicomPrinterConfig>
The configuration is comprised of three parts. General settings, the ActionsList, which is the list of things DP2 will be doing, and the Workflow, which is the order in which they will be performed.
In this example, any printed document pages are “trimmed”, i.e., margins are completely removed:
<Perform action="TrimImages" onError="Ignore"/>
and then they are sent to the DS5302 dry imager at IP address 192.168.1.100 and port 5040:
<Perform action="PrintOnDevice" onError="Discard"/>
If the imager happens to be unavailable, or communication fails, the document is “Discarded”. This is so we don’t create a long queue of documents.
Since we want our logo to appear at the top left, and not overlay the image, we will:
- Remove the Trim action, and
- Replace it with an action that puts the logo into place.
Remove Trim
Simply get rid of the parts of the configuration that relate to Trim. Leaving only:
<?xml version="1.0" encoding="UTF-8"?>
<DicomPrinterConfig>
    <General>
        <CheckingInterval>1</CheckingInterval>
        <SuspensionTime>1</SuspensionTime>
        <Verbosity>30</Verbosity>
    </General>
    <ActionsList>
        <Print name="PrintOnDevice">
            <Resolution>320 x 320</Resolution>
            <PrintMode>Grayscale12</PrintMode>
            <ConnectionParameters>
                <MyAeTitle>DICOM_PRINTER</MyAeTitle>
                <PeerAeTitle>DS5302</PeerAeTitle>
                <Host>192.168.1.100</Host>
                <Port>5040</Port>
                <AssociationTimeout>10</AssociationTimeout>
                <DimseTimeout>10</DimseTimeout>
            </ConnectionParameters>
        </Print>
    </ActionsList>
    <Workflow>
        <Perform action="PrintOnDevice" onError="Discard"/>
    </Workflow>
</DicomPrinterConfig>
Add the Logo
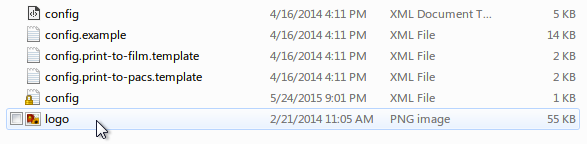
First, we need to save the logo image to a location where DICOM Printer can find it. The best place for this is the DICOM Printer config folder:
Open up the DICOM Printer Control center and click the shortcut to the config folder.

Save the logo here:
When making your logo image, please note the image type (PNG in this case) and the dimensions. We are using 200 x 100 px. The full path of the logo is:
%ProgramData%\Flux Inc\DICOM Printer 2\config\logo.png
Which, on English machines, is actually the same as:
C:\ProgramData\Flux Inc\DICOM Printer 2\config\logo.png
Create the Action
The logo can be placed onto every page using a PrintImage action, like so:
<PrintImage name="addLogo">
    <ImagePath>C:\ProgramData\Flux Inc\DICOM Printer 2\config\logo.png</ImagePath>
    <X>1</X>
    <Y>1</Y>
    <Width>16</Width>
    <Height>16</Height>
    <Aspect>keep</Aspect>
</PrintImage>
Note that:
- We’ve called the action addLogo. We’ll use this name later to call the action in the workflow.
- We’ve also instructed DICOM Printer 2 to place the logo 1% from the top (Y) and 1% from the left (X) of the page, and,
- The logo is going to be placed into a box that is 16% of the page wide and 16% of the page tall. If you are unsure of your logo dimensions, then we recommend this size.
- DP2 will fit the image into the box, and keep the original aspect ratio.
When included as part of the original configuration, the addLogo action looks like this:
<?xml version="1.0" encoding="UTF-8"?>
<DicomPrinterConfig>
    <General>
        <CheckingInterval>1</CheckingInterval>
        <SuspensionTime>1</SuspensionTime>
        <Verbosity>30</Verbosity>
    </General>
    <ActionsList>
        <Print name="PrintOnDevice">
            <Resolution>320 x 320</Resolution>
            <PrintMode>Grayscale12</PrintMode>
            <ConnectionParameters>
                <MyAeTitle>DICOM_PRINTER</MyAeTitle>
                <PeerAeTitle>DS5302</PeerAeTitle>
                <Host>192.168.1.100</Host>
                <Port>5040</Port>
                <AssociationTimeout>10</AssociationTimeout>
                <DimseTimeout>10</DimseTimeout>
            </ConnectionParameters>
        </Print>
        <PrintImage name="addLogo">
          <ImagePath>C:\ProgramData\Flux Inc\DICOM Printer 2\config\logo.png</ImagePath>
          <X>1</X>
          <Y>1</Y>
          <Width>16</Width>
          <Height>16</Height>
          <Aspect>keep</Aspect>
        </PrintImage>
    </ActionsList>
    <Workflow>
        <Perform action="addLogo" onError="Ignore"/>
        <Perform action="PrintOnDevice" onError="Discard"/>
    </Workflow>
</DicomPrinterConfig>
Adding the Facility name
Next up, the facility name at the bottom of the page. It requires a separate action, which looks something like this:
<PrintText name="addFooter">
  <Text>Clinica Odontologica – R. Odontologica 131 – São Paulo, Brasil</Text>
  <X>10</X>
  <Y>97</Y>
  <Width>80</Width>
  <Height>3</Height>
  <Color>0xFFFFFF</Color>
  <BackgroundColor>0x80000000</BackgroundColor>
</PrintText>
This is a PrintText action called addFooter, and it will:
- Place the text “Clinica Odontologica – R. Odontologica 131 – São Paulo, Brasil”.
- 10% from the left (X), and 97% from the top (Y) of the page.
- The text box will be 80% wide and 3% tall, with the font automatically adjusted to fit.
- The foreground colour will be white (0xFFFFFF) and the background will be a semi-transparent (0x80), black (000000) rectangle. This will allow the text to be read even when overlaying part of the image.
The completed configuration, with the addFooter action added to the workflow, looks like this:
<?xml version="1.0" encoding="UTF-8"?>
<DicomPrinterConfig>
    <General>
        <CheckingInterval>1</CheckingInterval>
        <SuspensionTime>1</SuspensionTime>
        <Verbosity>30</Verbosity>
    </General>
    <ActionsList>
        <Print name="PrintOnDevice">
            <Resolution>320 x 320</Resolution>
            <PrintMode>Grayscale12</PrintMode>
            <ConnectionParameters>
                <MyAeTitle>DICOM_PRINTER</MyAeTitle>
                <PeerAeTitle>DS5302</PeerAeTitle>
                <Host>192.168.1.100</Host>
                <Port>5040</Port>
                <AssociationTimeout>10</AssociationTimeout>
                <DimseTimeout>10</DimseTimeout>
            </ConnectionParameters>
        </Print>
        <PrintImage name="addLogo">
          <ImagePath>C:\ProgramData\Flux Inc\DICOM Printer 2\config\logo.png</ImagePath>
          <X>1</X>
          <Y>1</Y>
          <Width>16</Width>
          <Height>16</Height>
          <Aspect>keep</Aspect>
        </PrintImage>
        <PrintText name="addFooter">
          <Text>Clinica Odontologica – R. Odontologica 131 – São Paulo, Brasil</Text>
          <X>10</X>
          <Y>97</Y>
          <Width>80</Width>
          <Height>3</Height>
          <Color>0xFFFFFF</Color>
          <BackgroundColor>0x80000000</BackgroundColor>
        </PrintText>
    </ActionsList>
    <Workflow>
        <Perform action="addLogo" onError="Ignore"/>
        <Perform action="addFooter" onError="Ignore"/>
        <Perform action="PrintOnDevice" onError="Discard"/>
    </Workflow>
</DicomPrinterConfig>
And That’s It!
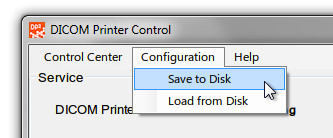
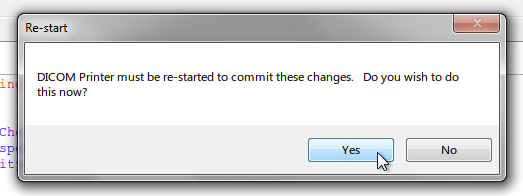
Now, save and restart the DP2 service, like so:
And then,
Your next print job will have your logo at the top right and facility name at the bottom!
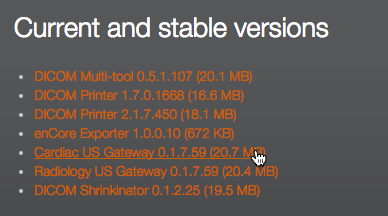
Thanks for reading! Be sure to check out our downloads page, where you can download fully functional 60 day evaluations.
At 495 USD, DICOM Printer is a stupendously inexpensive application. We’re excited that so many people find it useful.